Connected Educator

https://docs.google.com/presentation/d/1Bef7sroJ2PbGccGHX1M-8XumX2RTwYSfn5Yw7uW5zqo/edit?usp=sharing

Over the last 4 weeks, I have taken the opportunity to reflect on my Personal Learning Network. When I started this course, I didn’t understand the need for a dedicated online PLN. I would read the emails I got from NAEST and read the articles. I would discuss new ideas with my colleagues. I would scroll through social media and see posts from education influencers, but I would rarely engage or dive deeper. Looking through the social media posts, I discovered a wealth of knowledge. Going forward I plan to look here first when I need a new idea to create an engaging lesson or I am struggling with how to adapt something from my students. I also want to take the time after this class ends to find more online communities to engage and interact with. I set notifications on my phone to sign up for the full_sped_ahead professional development courses during the school year. This will be helpful because my school district does not offer a lot of Special Education professional development. I have subscribed to YouTube channels, but they were mostly channels that I use in my lesson designs. Finding channels to subscribe to that will help me grow as a teacher was different. As I was exploring channels, I found it difficult to find quality channels to follow. Because I teach in a specific program, general education channels and even some special education channels do not benefit me. I am especially excited to continue to follow The Special Educator channel, as she has moved into administration and I am hoping that her new content will help me to understand what admins are looking for in a special education classroom and how to work better with administration. I am most excited about sharing the information that I have learned and that I will continue to learn about with my colleagues, especially my co-teacher. 
Teacher as Professional

https://www.smore.com/xkt8f

Because I knew I wanted to create an eText for this challenge, I explored Smore, emaze, and Flipsnack. I started with Flipsnack. While I that it was easy to and there many template designs to choose from, this tech tool felt more appropriate for flyers and brochures, which was not what I wanted this challenge to be. I then tried emaze. This too was a nice tech tool, but was more like a slide presentation and since I have used Google Slides and Prezi I wanted to explore something I haven’t used before. Smore was user friendly and I think will make a nice addition to my parent communication tools. 

Throughout this class, I have already shared many of the tech tools with my co-teacher, sharing many of the projects and my list of tech tools I want to use with her.  I plan to share what I have learned with my department through PLCs and with the school and district through professional development. 

Teacher as Leader

https://wakelet.com/wake/-Cq6A-twWYhmfxU8K8HmD

A current problem in my school is bringing Social Emotional Learning into the classroom. Relationship skills, responsible decision making, self-management, self-awareness, and social awareness have a direct effect on student achievement, therefore there needs to be a commitment by the staff to implement SEL. My goal is to present this curation during a Professional Development session at my school. I hope to help my fellow teachers understand why SEL is important and provide examples of how it can be included in the classroom.

I included the 5C’s in my Wakelet to provide all the information about the importance of SEL curriculum in one place for my school. 

Connect – In this section, I included articles that stress the importance of SEL in the school and classroom setting. 

Communicate – In this section, I included articles to help teachers communicate with parents about the importance of SEL in the school and classroom setting. 

Collaborate – I used this section to share websites that I use to find my SEL content to help create meaningful lessons. I believe including tools to help other teachers get started will foster collaboration and decrease frustration. 

Curate – In this section, I shared videos to provide an example for each CASEL framework (self-awareness, self-management, social awareness, relationship skills, and responsible decision-making. 

Create – In this section, I included sample works created as a part of my SEL curriculum in the classroom. I hope to give other teachers a starting point for lesson creation. 

Equitable Access to Tech – I wanted to show the importance of SEL, so I chose articles that demonstrate the importance of SEL within digital equity as well as the importance of digital equity and technology itself. 

Culturally Pro-Active Teaching – In this section, I included articles that demonstrate how being culturally responsive and SEL are connected.

When searching for articles and videos to include, I knew I wanted articles that were fairly recent and relevant to the CASEL SEL framework, since this is the guide my school has embraced for the implementation of SEL. For the videos, I shared, I wanted to find one example for each CASEL framework (self-awareness, self-management, social awareness, relationship skills, and responsible decision-making) to provide an explanation or example of each framework. When looking over articles and videos to include, I excluded articles that I felt were too wordy or long to read and I excluded videos that were considerably long and dry. One of the most frequent complaints I hear about professional development is that it is “long, boring,  and time-consuming”. By carefully selecting engaging content, I hope to avoid this. 

As a first year member of the leadership team, I hope that this curation will help me guide my coworkers to make gains towards one of our School Improvement goals, which is implementing SEL in the classroom and school. 

I explored Symbaloo and Wakelet. I enjoyed Symbaloo and while I did find there to be a steep learning curve, the grid-style format appealed to me. However, I decided to go with Wakelet because after sharing the Symbaloo grid with members of my leadership team, I was provided feedback that the grid might be overwhelming for some. And something I have learned recently is that if a teacher is overwhelmed by the presentation, they will shut down and not attempt to explore. With Wakelet, it was easy to organize and it will be easy to add information throughout the year, I can even add collaborators to add information as the year progresses. 

Teacher as Analyst

https://docs.google.com/presentation/d/1_sLAUVrPGxFkZs5mcnoLETB6JLf3CFLc3IDgdqzY9vs/edit?usp=sharing

 The tools I used:

  • Ed Puzzle* – I chose Ed Puzzle because it allowed me to include a review video (the video I used during the lesson). I liked this tool because I can add questions for the students to answer while watching the video. I liked this feature because it added another level of review and I will get data on how the student answered the questions, thus allowing me to know who is ready to continue and who needs more review. I will use this tool again, as I can link it to my Google Classroom and then have data for each class as well as individual students. 
  • Buncee* – I chose Buncee because I liked that I could create a digital worksheet. It was easy to use and to create. This is even a tool that I could see my students using to create. However, I wish that it was more interactive and the students could type their answers in the link. I am not sure that I will use this tech tool again, because it is not interactive nor does it link to Google Classroom. 
  • Boom Cards – I chose Boom Cards because I wanted another interactive practice activity. I liked this tech tool because you can either create or purchase Boom Cards and the lessons provide immediate feedback to the students based on answering the question correctly. I will continue to use this tech tool as a practice item in my classroom.
  • SplashLearn* – I chose SplashLearn, because this is a tech tool provided by my district and until recently was not available for high school students. It has interactive games and an at-home feature. I liked that there were multiple games within the lesson that could be broken down by grade level. I can differentiate the lessons based on the level of my students. I will use this tool as a practice item in my classroom.
  • ABCya* – I chose ABCya as an alternative game site for my students. There was only one game to play on adding fractions, but you can play that game multiple times. If I use this tech tool again, it will probably be for a quick independent at the end of the lesson. 
  • Sketchpad* – I wanted to offer my students an opportunity to design their own problems to demonstrate their understanding. I do have a concern about the accessibility of the tool, as my students will have to use their mouse to create their problems. I will have to see how well my students use this tool because making a decision about using it again.
  • Beep Audio* – I discovered this tool after reading some classmates’ blogs and wanted to try it for making my Choice Board accessible. I will use this tool again, because not only can you is it Google Slides and Google Docs, but you can also use Google Forms and that is important to me. 

*New tool.

Tools I explored but did not use:

  • Kahoot – I have used Kahoot in my classroom, but usually for fun practice or during breaks. I know some teachers use it as an assessment tool and I wanted to explore that option. Ultimately, I decided against this because my students are familiar with this tool being a fun classroom tool, not an assessment tool. 
  • Milo – I wanted an interactive whiteboard tool and while I found it easy to use, I worried that my students would not be able to navigate it easily.
  • I Know It – I found this while searching for interactive worksheets. I decided against this tool because I couldn’t create the problems, there were preset categories and many of the questions went beyond my lesson. 

Is this occurring at the moment of need?

This choice board would be shared with the students after they have had a lesson on how to add fractions and after multiple practices including class, small group, and independent practices. If I were to present this choice board before the lessons, my student would become frustrated because although there is a review video, my students need multiple opportunities for practice before assessment. 

Is there a caring human being behind this? YES!

I took my time to explore many tech tools that would be easy for my students to use independently. This is important because if the tool is difficult, it could create frustration and dysregulation for my students, and then no learning is occurring. I also have to consider if the tech tool is too difficult I might no longer be assessing the curriculum, but my student’s ability to use the technology.

Is this value-added?

My students will be able to demonstrate their understanding of adding fractions and then use this skill to continue learning other functions with fractions. 

Students will be able to add fractions with like denominators. This choice board will support students in achieving this goal by providing them with different opportunities to demonstrate their understanding of the skill. 

This choice board will provide me with a way to determine if students are struggling and then be able to provide opportunities for reteaching. It can also show me if students have mastered the skills and are ready to move to the next lesson or work on enrichment activities while reteaching is occurring.

Teacher as Collaborator

https://prezi.com/p/gqnjdg3vzdeg/transition-into-independent-living/?present=1

In this lesson, students will ask experts from Transition Agencies questions about how their agency can help them as they transition into independent living. This links to ISTE sub-standard 2.4.c – Use collaborative tools to expand students’ authentic, real-world learning experiences by engaging virtually with experts, teams, and students, locally and globally.

In How Radical Collaboration is Shaping the Future of Schools, Cristina Riesen, talks about how students need to become creative collaborators and life long learners. By fostering the joy of learning we are helping students become collaborators and life long learners. This lesson will allow my students to be active participants in their learning, thus fostering the joy of learning and allowing them to experience new learning methods. 

Are there community organizations or businesses that could enhance student understanding of the unit? and Can you better connect your curriculum to authentic experiences by collaborating with experts? This activity would occur during a unit on Connecting with Community Resources. Students will benefit from hearing the answers to their questions from the agency representatives versus searching a website. While students with IEPs are supposed to be active participants in their transition planning, many students in my program are not familiar with the agencies that can support them after high school and this will increase their knowledge and help them make important decisions. 

For this challenge, I used Prezi and Flip. I wanted to explore a new presentation method that would be interactive and easy for the students to manuver. Prezi has a learning curve to it but once I was able to figure out how to add topics and subtopics it was easy to create a presentation that could include all the information for the presentation. I will use Prezi again for teacher led classroom presentations.

I wanted to give my students an opportunity to use a program that many of their general education peers use, and Flip presentations are a popular tool. I found Flip easy to use and create videos with and I am confident that my students will be able to create their own videos to ask their questions. I like the idea that my students can continue to respond to videos and ask follow up questions, keeping the collaboration going throughout the year.

Using Flip is on the Technology Integration Matric as Collaborative-Adoption. Students will use Flip to collaborate with experts in this activity and they will have some choice when it comes to what question they want to ask te expert. Based on SAMR, using this tech tool is a modification to the original lesson plan. Prior to adding the use of Flip to collaborate, my students were given the information they needed, but not engaged in the lesson.

Teacher as Designer

https://drive.google.com/drive/folders/1CY_Z0jyadjnP8hweRO_8IiClOgjTWlds?usp=sharing

I initially wanted to use Microsoft Powerpoint when designing my lesson; Microsoft’s accessibility statement and its features in Powerpoint impressed me. I especially enjoyed the ability to make sure my presentation was accessible. However, I decided to use Google Slides. Google’s accessibility statement was standard and did not play a role in my decision to use this tool. This decision was made for several reasons, the most important is that my students are familiar with Google Slides and not Powerpoint. While this might not seem like an issue, due to the nature of my classroom familiarity with tech tools is important. I did take the time to download my Google Slides presentation into Microsoft Powerpoint and run the accessibility feature to see how I could make my Google Slides presentation more accessible. 

Since Google Slides does not have a way to record the slide, I wanted to explore was to add voice-over to the slides. This will allow students that have vision concerns to hear what is on the slide. I needed to find a way to record just my voice, not video, and have an audio link created that could be saved in my Google Drive since you can only insert audio into Google Slides from your Google Drive. I discovered Rev. It was easy to create the recording and if you create a free account there is no limit to recordings. You do have to download the recording to your computer, but once downloaded you can move to your google drive. I did find the website difficult to navigate. If you move off the recording page, it was not easy to go back. I would use this tool again to record audio only. 
A part of this lesson has a Google Form quiz. I wanted to have audio attached to each question. This requires an extension. The first extension I explored was Mote. Mote is easy to use and embeds into Google Forms, creating an audio link within the question. Unfortunately, you can only record up to 60 seconds, so I had to use Rev to have audio for the passage within the form. I do not think I will use Mote again. You can only record up to 20 items, without a subscription. An individual subscription is $60 a year. I reached out to the tech department in my district, because of the built-in accessibility features that all students have on their Chromebooks the district will not buy a district plan.

Perceivable – 

  • I included a video in my presentation and I knew I wanted to have captions with the video. One thing I noticed was when embedding the video in Powerpoint the captions did not start automatically like they do in Google Slides. This feature was another reason I chose Google Slides as my presentation mode. 
  • I used Rev to create audio for each side. The main concern I have is the audio feature of the presentation. Unfortunately, I could not automate the multiple audios on one slide to play in a set order one at a time. This is an area that will need more work to make the audio usage meaningful and accessible to everyone. I did consider using Beep, but because you have to create that audio in comments, the audio would not be there in slideshow mode. I did use Beep to add audio to the keyboard shortcut textbox, since that should be played prior to going into slideshow mode.

Operable – 

  • I added a text box on the first slide to let students know that they can start the presentation with Keyboard shortcuts. This will allow the student to not have to use a mouse to start and move the slideshow.  One thing I will need to explore is how to use the Keyboard to open hyperlinks, unfortunately, the students will have to use a mouse to navigate to these links. 
  • I also removed timed transitions on the slides. This will allow the students to set their own pace to read or listen to the information on each slide. 

Understandable – 

  • I used plain language throughout the presentation. This makes the information easy to understand for all students.
  • On the editable parts of the presentation, I used Verdana,  an ADA-compliant font. 
  • I used the same font and color scheme throughout the presentation, making the slides easy to read.
  • I made the hyperlinks stand out by changing their color. This will draw the students’ attention to them. 

Robust – 

  • Using the Check Accessibility feature in PowerPoint pointed out that some of the colors I had initially used might be difficult for some views. I then adjusted those colors to darker shades so that they did not blend in with the background.

This presentation is the first lesson on Asking and Answering questions. After this lesson the students would have an Independent Practice to demonstrate their understanding of the lesson, since this is the first lesson, I do not expect my students to have mastered this skill yet.  My students will have multiple lessons on this topic and will be able to show growth throughout the unit. This presentation will be something that is used for whole-class instruction. Fortunately, the accessibility features that have been added, will allow me to share with students that are absent or homebound. 

Rev and Mote are Active-Entry based on the Technology Integration Matrix. The students are given basic information from the lesson to learn and then asked to show their understanding. These tools are used as a substitution in the SAMR model, as they are replacing the need for me to read aloud, but do allow the student to work independently if needed. 

Teacher as Facilitator

https://drive.google.com/drive/folders/1hRl5eOHL9fr5bzOuuc8g4eBaCPnWjMW6?usp=sharing

After a Google search, I found StoryboardThat. While it is not a video platform, it will allow my students to independently create a form of media to share. It is user-friendly and you simply decide on backgrounds, characters, and speech bubbles to use. Once you have made these decisions, you can drag and drop them and then edit them as needed. I will use StoryboardThat again within my classroom. 

I thought that this would be a great opportunity for the students to create a video or some other form of digital media. I explored many options for my students to use on this project. I explored Toondon (which unfortunately is no longer) and PowToon. I was excited to use PowToon, but my students enjoy many of the student and teacher-created videos from this site. Unfortunately, after spending some time trying to create an artifact to show my students what I am looking for, I decided that this tech tool would not work for them. It was not as user-friendly in fostering independence as I had hoped. 

Using StoryBoardThat falls under the Contructive-Adaptation section of the Technology Integration Matrix. The students will use the tech tool independently but are being told what they need to create and set criteria. Based on the SAMR model, this is a redefinition of what students can use and achieve as this type of activity has not been used in my classroom before. 

This artifact will be the final project to demonstrate understanding at the end of a Cyberbullying lesson. This lesson will support students in engaging in ISTE Standard 1.2.b – Students engage in positive, safe, legal, and ethical behavior when using technology, including social interactions online or when using networked devices.

Through the lesson, students will learn what Cyberbullying is, identify examples of cyberbullying, and discuss ways to stop cyberbullying. This lesson teaches students how to be online safely and engage in positive social interactions.

Creating student-centered projects can be difficult in my classroom because if the technology is not user-friendly, the projects can become more teacher created. Unfortunately, my students are rarely given the opportunity outside of Art classes to create. I was struck by the idea of Design Thinking and the things that happen when students create their own projects, especially how students become empowered learners and see creativity as more than just Art. (Spencer, John, 2016, May 7th, Ten Things that Happen When Kid Embrace Design Thinking). While I know that my students will not be able to be as independent in their projects as their general education peers. There are areas where they can be, and this needs to be explored and used within the classroom. Not only does creating a project of their own empower their learning, but it fosters their independence which is a goal of my programming. 

Teacher as Citizen

https://docs.google.com/document/d/1wcNZPInQkfYR634Cw2kJguHF3iHMh2LQnW4sQkNWHys/edit?usp=sharing

Digital Access is the ability to fully participate in a digital society. I picked this topic because the digital divide is prevalent among my students.

Many think Digital Access is about having access to technology, but it is also about having access to usable technology. While my students have 1:1 devices, I have to ensure that they also have Digital Accessibility. 

Digital Accessibility ensures that people with disabilities are able to access technology as easily as everyone else. This goes beyond large font, captions, and read-a-loud software. It is important for teachers to consider fonts, colors, and the overuse of graphics when creating visual elements for their lessons.

Digital Access meets 2.2.B ISTE Standard: Advocate for equitable access to educational technology, digital content and learning opportunity to meet the diverse needs of all students. By developing an understanding of what Digital Access is and how to make technology Accessible for everyone, educators will meet this standard. 

While creating the Hyperdoc for Digital Access I explored ThinkLink and Explain Everything. I found these digital tools interesting and would create engaging lessons, but ultimately because I anticipate using this lesson as a Professional Development activity for the teachers at my school, I went with a PowerPoint Presentation (it is saved as a Google Slides Presentation to be able to share online). This is a tech tool that the teachers in my district have access to and their accessibility features help to support my presentation. I decided to use Ideaflip as a way to have the participants share their ideas about how they would modify digital content to be accessible online. This tool was easy to use and interactive. This tool could be used in my classroom to have the students answer questions, share ideas, or vote on a class decision.  I incorporated Poll Everywhere as a reflection tool. Using the Word Cloud feature will make a graphic of the important takeaways about Digital Accessibility. Within in my classroom, I can use this tech tool as a fun way to see how my students are feeling about topics and lessons covered in class, I can also use it in a fun way by creating silly polls to use as icebreakers or openers. 

Resources Used: 

Why is Digital Accessibility important?

This video is an informative overview of Digital Accessibility and its importance.

Web Accessibility: POUR Acronym Explained – Equalize Digital

This website explains POUR and offers suggestions on how to design digital content to be accessible.

An Introduction to Accessibility – Digital.gov

This website is a comprehensive overview of Digital Accessibility. It explains POUR, offers a brief explanation of what a disability is, and tips on how to design accessible digital content.

Responding to Classmates’ Progress Tracker

Type of ResponseLink to Comment w/ Person & Challenge Listed
Extend/ApplyJamie’s Music Tech Blog – Teacher as Collaborator
Connect/CompareUnderstanding Educational Technology – Teacher as Professional
Agree/DisagreeMakingMusicMakingProgress – Teacher as Analyst
Discover/InterpretChemistry with Brunner – Teacher as Leader
QuestionJill Lartz/Chasing Marbels – Teacher as Designer
SynthesizeDeep Diving into Tech with Caseelynn Johnston – Teacher as Leader
ReviseEmily Clark The Music and STEAM Teacher – Teacher as Designer
InformKenna’s Educational Technology Journal – Teacher as Citizen
What’s Missing?Ms. Scherbing’s Website – Teacher as Facilitator
Free Choice (Connect/Compare) Jill Lartz/Chasing Marbels – Teacher as Analyst

Extend/Apply. Grasp the ideas in the post to which you are responding and take them further. If the post is theoretical, pursue the implications of the ideas with regard to a specific situation or example.

Connect/Compare. Connect the post to which you are responding into “dialogue” with other texts we’ve read, posts, your experiences, or your expectations for the future.

Agree/Disagree. It’s easier to be interesting by disagreeing than by agreeing, but I believe the ability to agree creatively is also important. Make sure to expand upon why and how you agree or disagree.

Discover/Interpret. Try to read (that is, make meaning of) the post in a way that will not be obvious to most readers. Try to notice something others might not notice.

Question. Raise some intelligent, fruitful questions. You may also want to answer your own questions. You can speculate by asking “What if . . . ?”

Synthesize. Pull together ideas and examples from diverse sources and pose a unifying idea, insight, or theme related to the post.

Revise. Look back on a previous reading, post, or other experience, and see whether the current post gives you a new idea or leads you to change your mind.

Inform. In response to the post, do some research. Share relevant information, evidence, facts, quotations, clippings, details, and other data.

What’s missing? What do you wish or believe should have been addressed in this post that was not addressed?

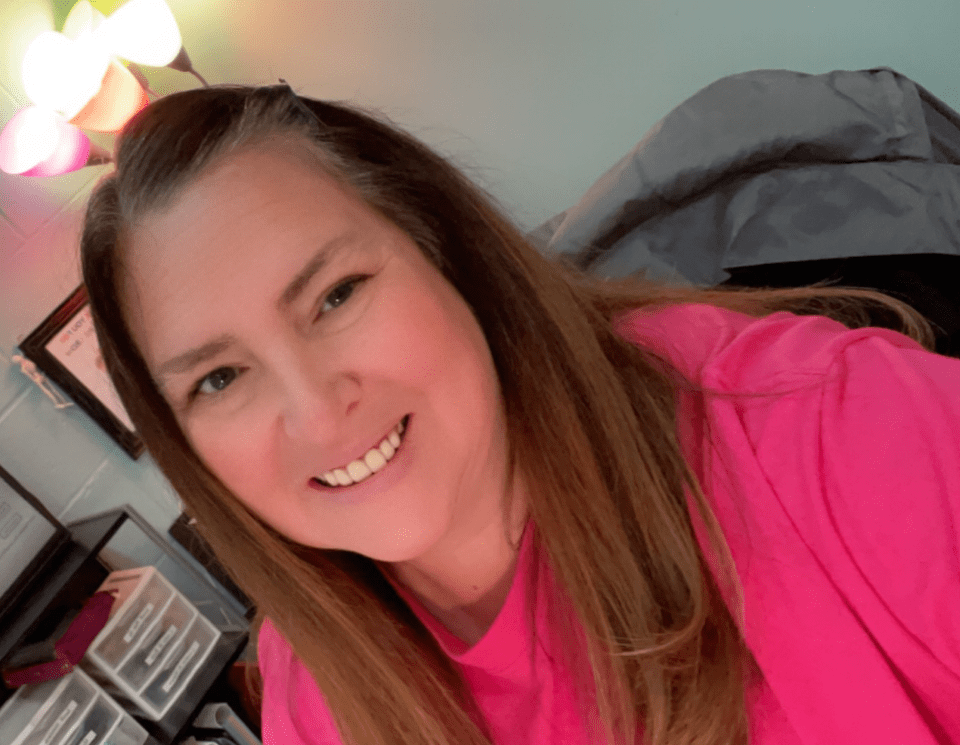
Hello Everyone!

My name is Heather Lueschen. I am a High School Special Education Teacher at a local high school. I work in a Special Services program that teaches a blend of academics and life skills.

I am excited to learning about different technology that I can use in the classroom to enrich and engage my student’s education.

I look forward to working with everyone and learning with and from you over the next four week.

Skip to toolbar